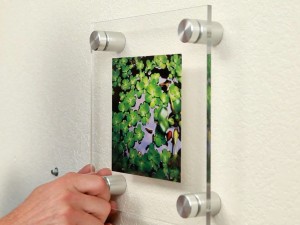
How To Install a StandOff Cap and Barrel System
Standoffs are a classic mounting option for awards, photography, artwork and signage. They can also be used for more structural applications like counter tops and reception panels. Standoffs come in a variety of colors, sizes and shapes for different purposes.
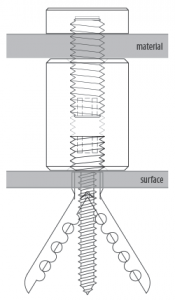
A standoff system will typically include an anchor, barrel, threaded stud and a cap. The anchor is used to mount the standoff to your surface, like your wall or counter top. The standoff barrel is what spaces your material at a desired distance from your surface. Then, the threaded stud is used to sandwich your material with the cap which is the decorative finish to your mounting installation.
Let’s get started on how to complete a standoff installation:
Step 1: Determine the weight of your material to be mounted, its thickness and overall size.
The thickness of your material will determine what length threaded stud you will need.
Also take note of the type of surface you are mounting to like concrete, wood or drywall. These variables are important in order to determine the correct anchor that you will mount your barrels to and how many connections will be required.
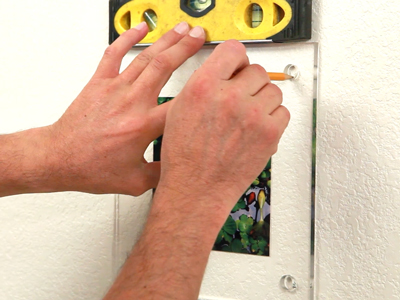
Step 2: Using the holes in your material as a template, pencil in drill marks on your mounting surface and begin drilling your anchor holes.
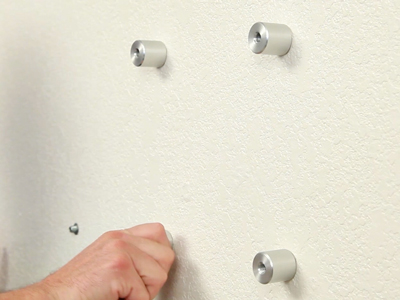
Step 3: Install your selected anchor, leaving enough external threading to allow your barrel to attach to the exposed end.
Step 4: Thread down your selected barrels onto your anchor and hand tighten them.
Step 5: Thread your correctly sized stud into your barrel. Your stud size is determined by your material thickness and the cap and barrel combination.
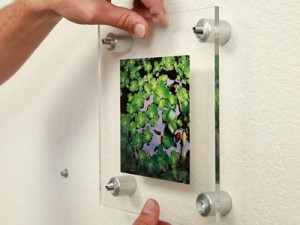
Step 6: Place your material onto the exposed studs and finish off your installation by fasten your caps over your material and thread onto your studs.


